Quick Start: The First Foundation
Lesson 1: The First Foundation (Quick Start)
Every novel begins with a single choice: the decision to commit an idea to reality. In NovelOS Studio, that commitment takes the form of a Project.
Think of a “Project” as a dedicated box where everything related to your novel lives—your drafts, your character notes, your maps, and your research. By keeping everything in one place, you ensure that you never lose a great idea in a sea of loose files.
Step 1: Your Digital Bookshelf
When you open NovelOS, you see the Project Dashboard.
![]()
What are we looking at?
This is your library. Currently, it might be empty, but soon it will be filled with the worlds you create. The cards you see represent separate universes. You can have a project for your Fantasy Trilogy, another for your Memoir, and a third for your collection of Short Stories.
- Start a New Project:
Click the “New Project” button. This is the moment you break ground. - Enter the Workspace:
You will be transported to the Overview module.
Step 2: Defining the Soul (Metadata)
Before we write, we must define what we are writing. This might seem like paperwork, but it’s actually a psychological contract with yourself (and your future reader).
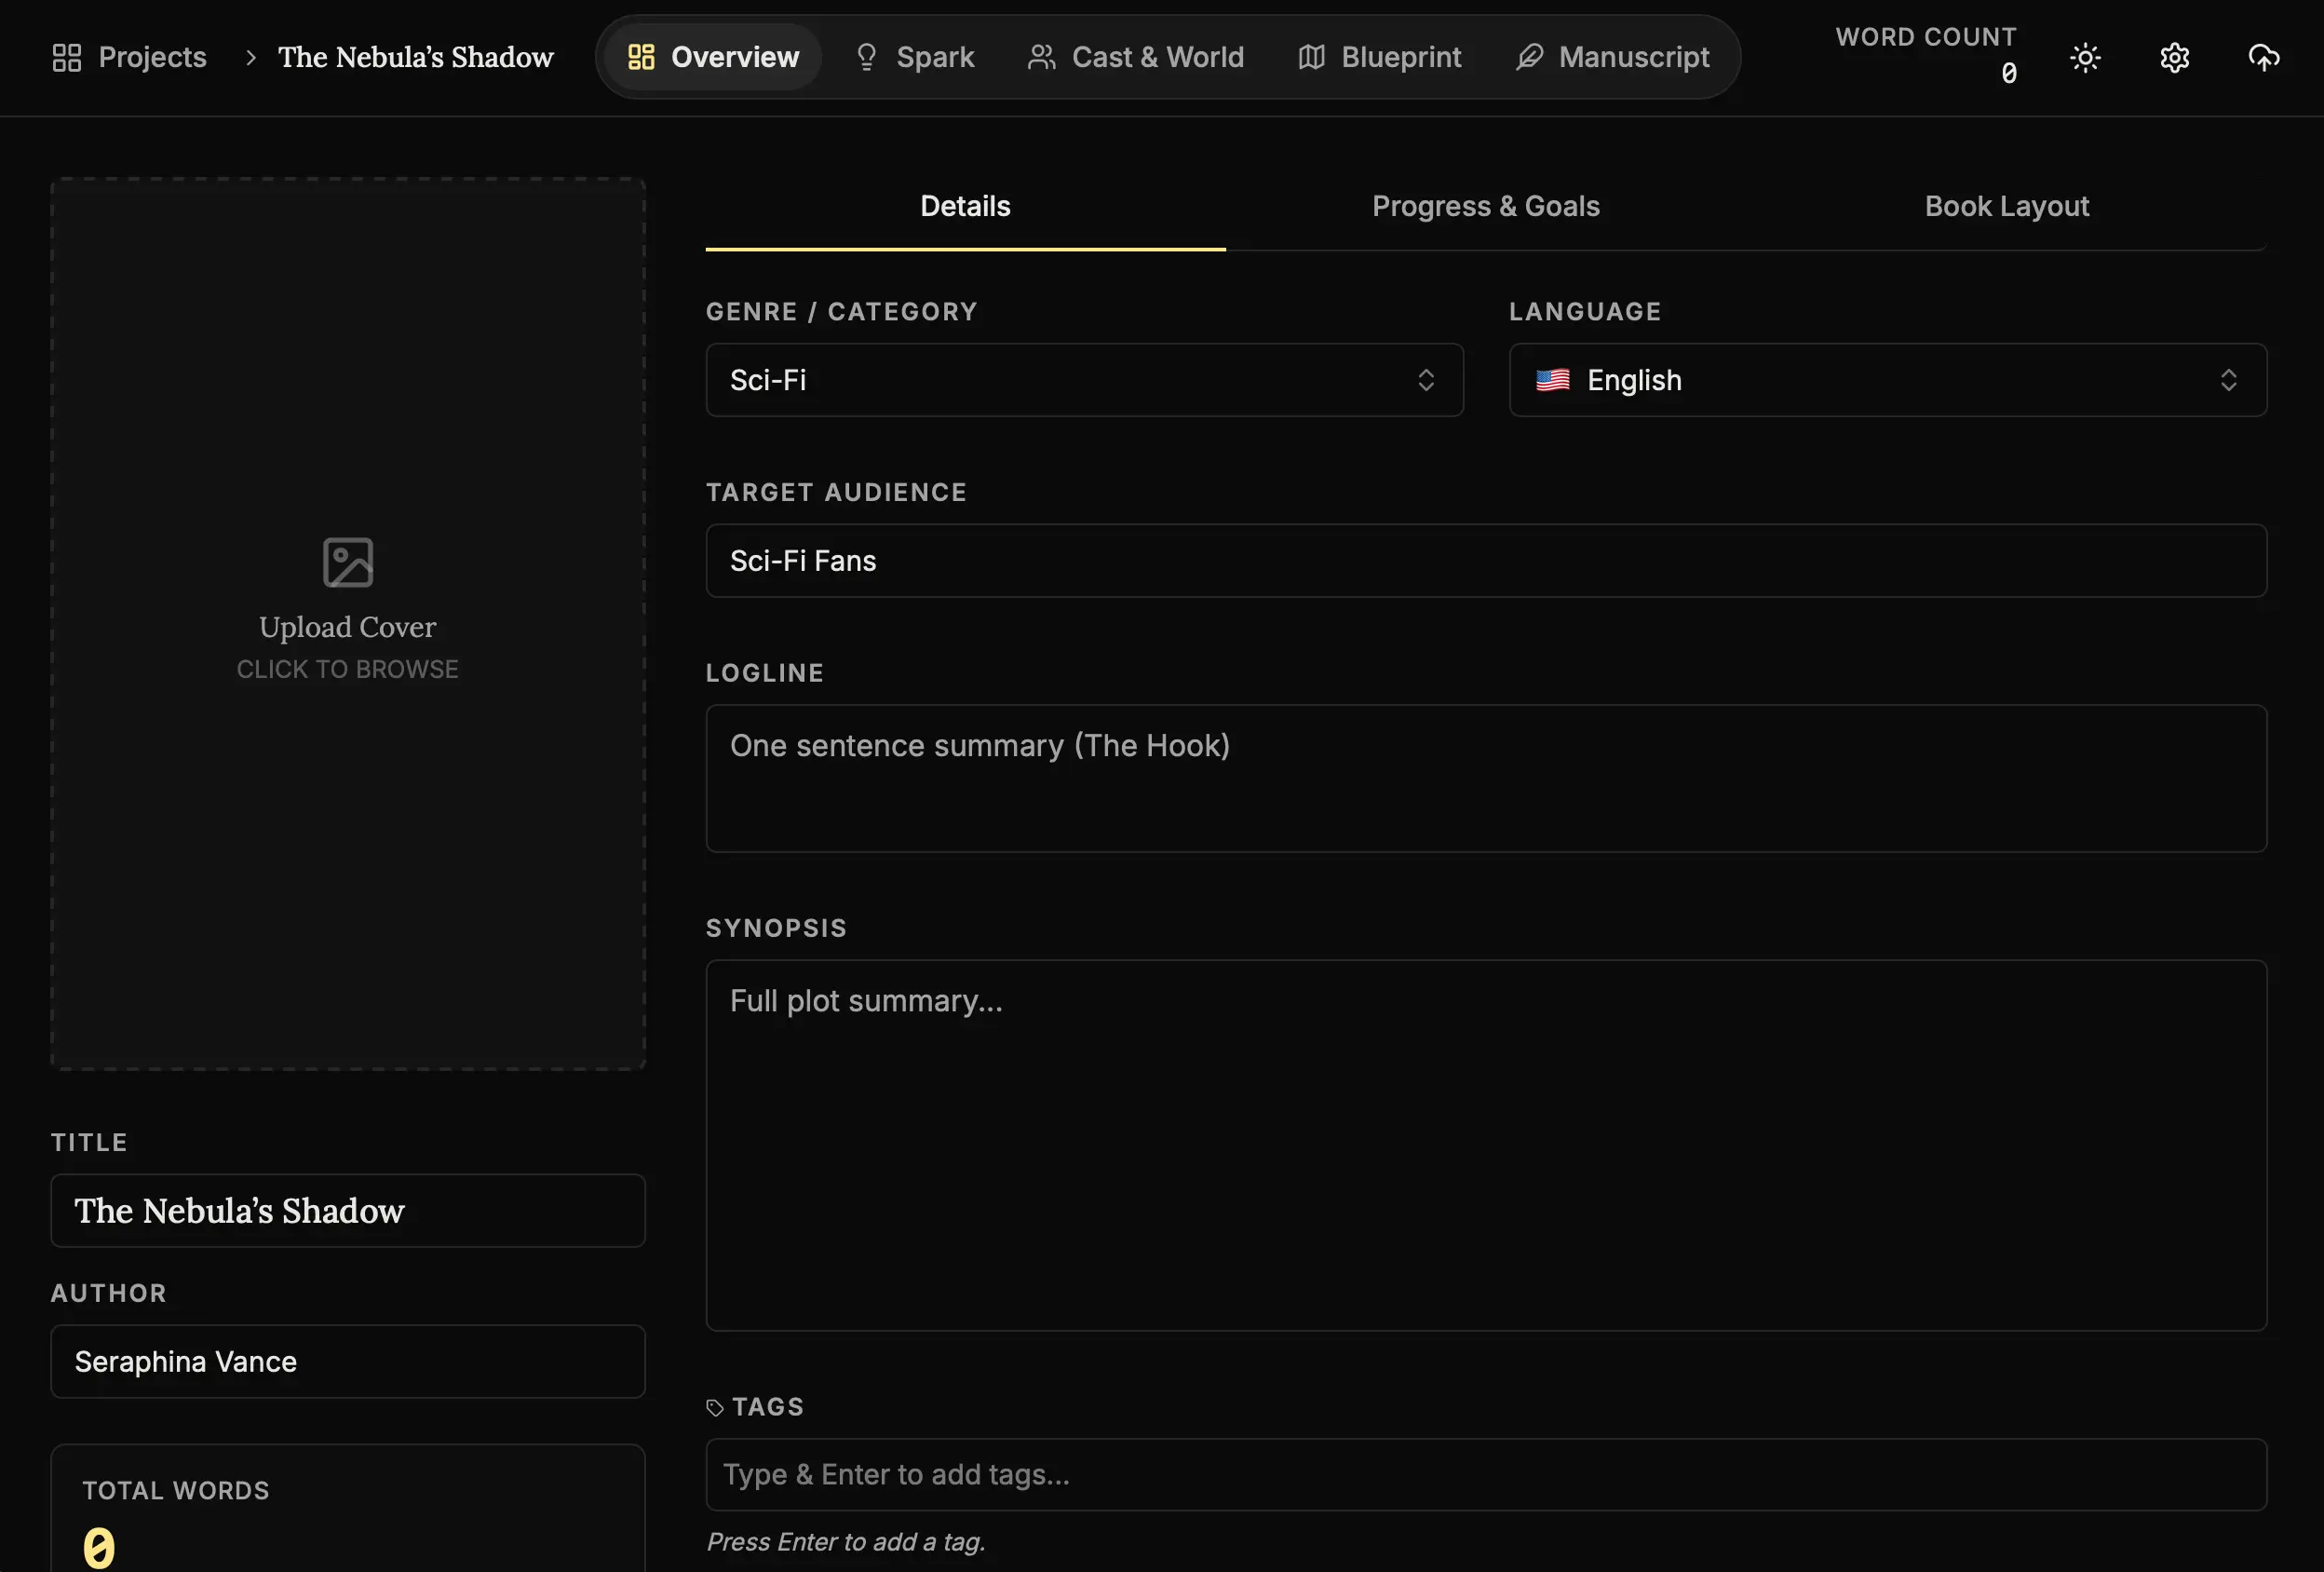
The Purpose of this Screen:
This is your identity card. In the middle of a long draft, it’s easy to lose sight of your book’s core identity. This screen anchors you.
- Title:
“The Nebula’s Shadow” (Don’t worry, you can change this later). - Author Name:
Your name or pen name. seeing it written down makes it real. - Genre:
“Sci-Fi”. This is crucial. It tells the AI Muse what kind of tropes and tone to expect. If you define your genre as “Horror,” the AI will suggest darker, more suspenseful ideas than if you chose “Romance.”
Step 3: Understanding the Layout
NovelOS is designed around the different “hats” an author wears. Look at the Topbar Navigation:

The Three Modes:
- Cast & World (The Worldbuilder): This is where you go when you need to invent a person or a place. Use this when you’re stuck on “Who is this character?” or “What does this city look like?”
- Blueprint (The Architect): This is your bird’s-eye view. Use this to plan your plot and move scenes around without rewriting thousands of words.
- Manuscript (The Writer): This is your quiet space. Here, the worldbuilding tools fade away, leaving only you and the page.
Step 4: The North Star (Synopsis)
At the bottom of the Overview page is the Synopsis section.
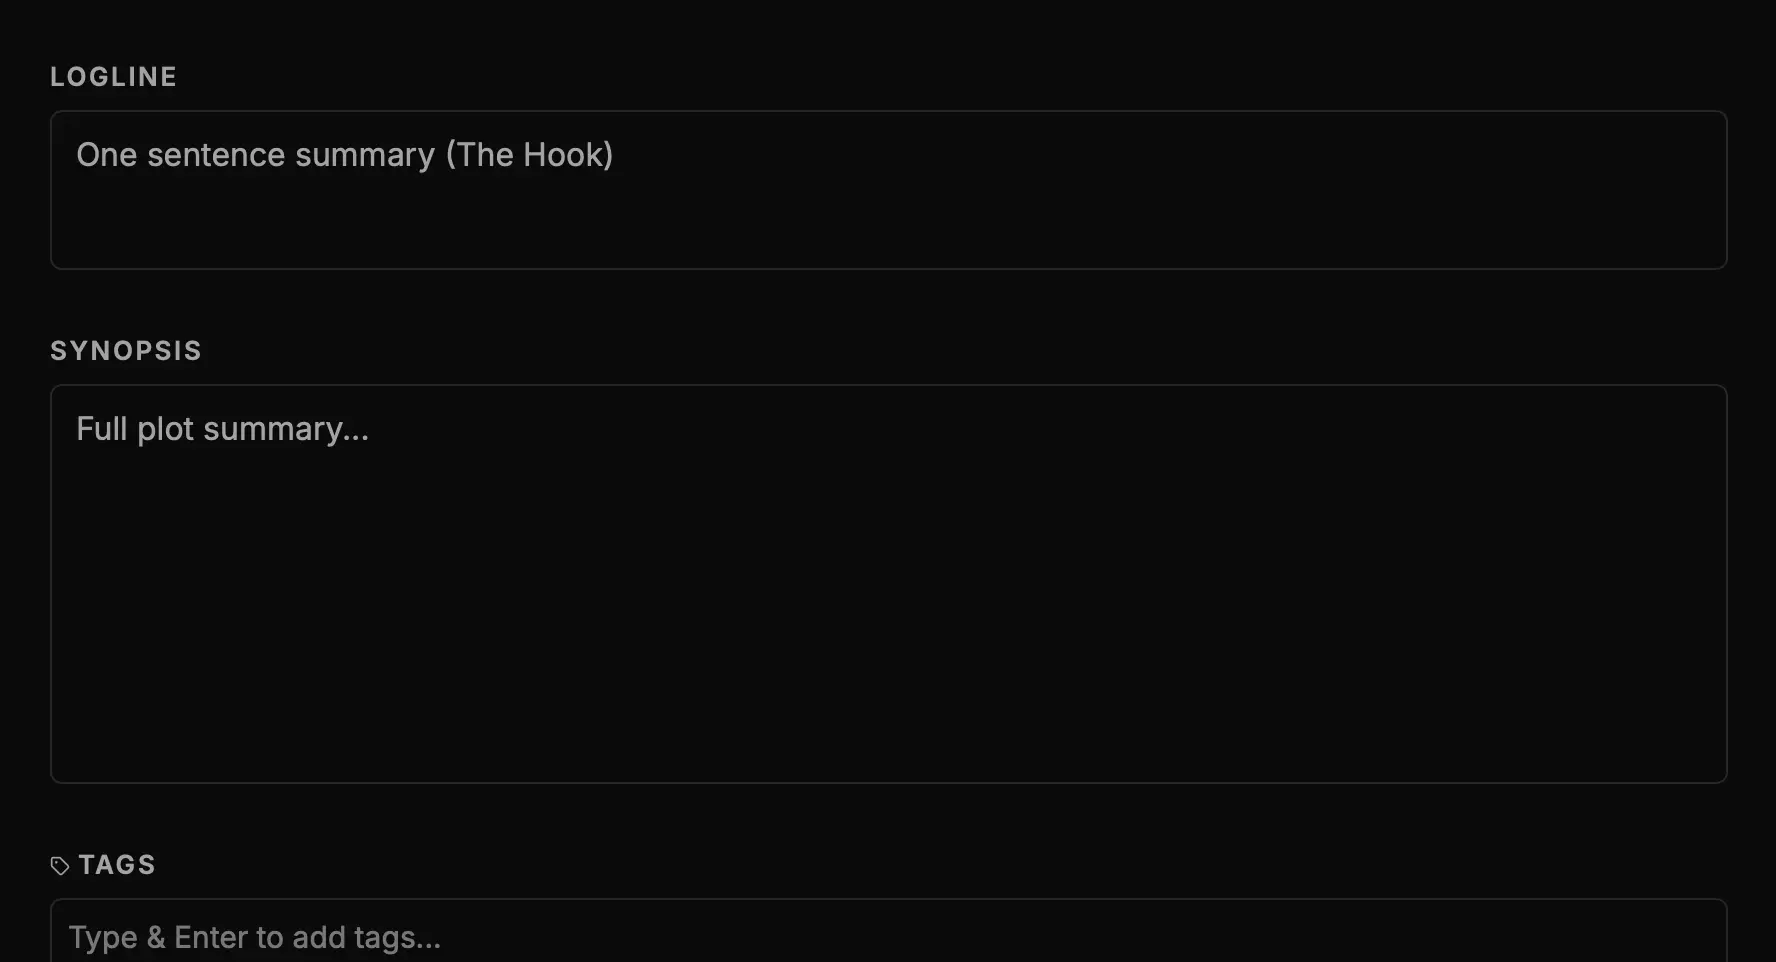
Why write this now?
A synopsis is your North Star. When you are 50,000 words deep and stuck in the murky middle of Act 2, you will come back here to remind yourself what this story is actually about.
Task: Write three sentences summarizing your story.
Example: “A disgraced miner finds an ancient artifact. He must smuggle it off-world before the corporation finds out. If he fails, the colony will be destroyed.”
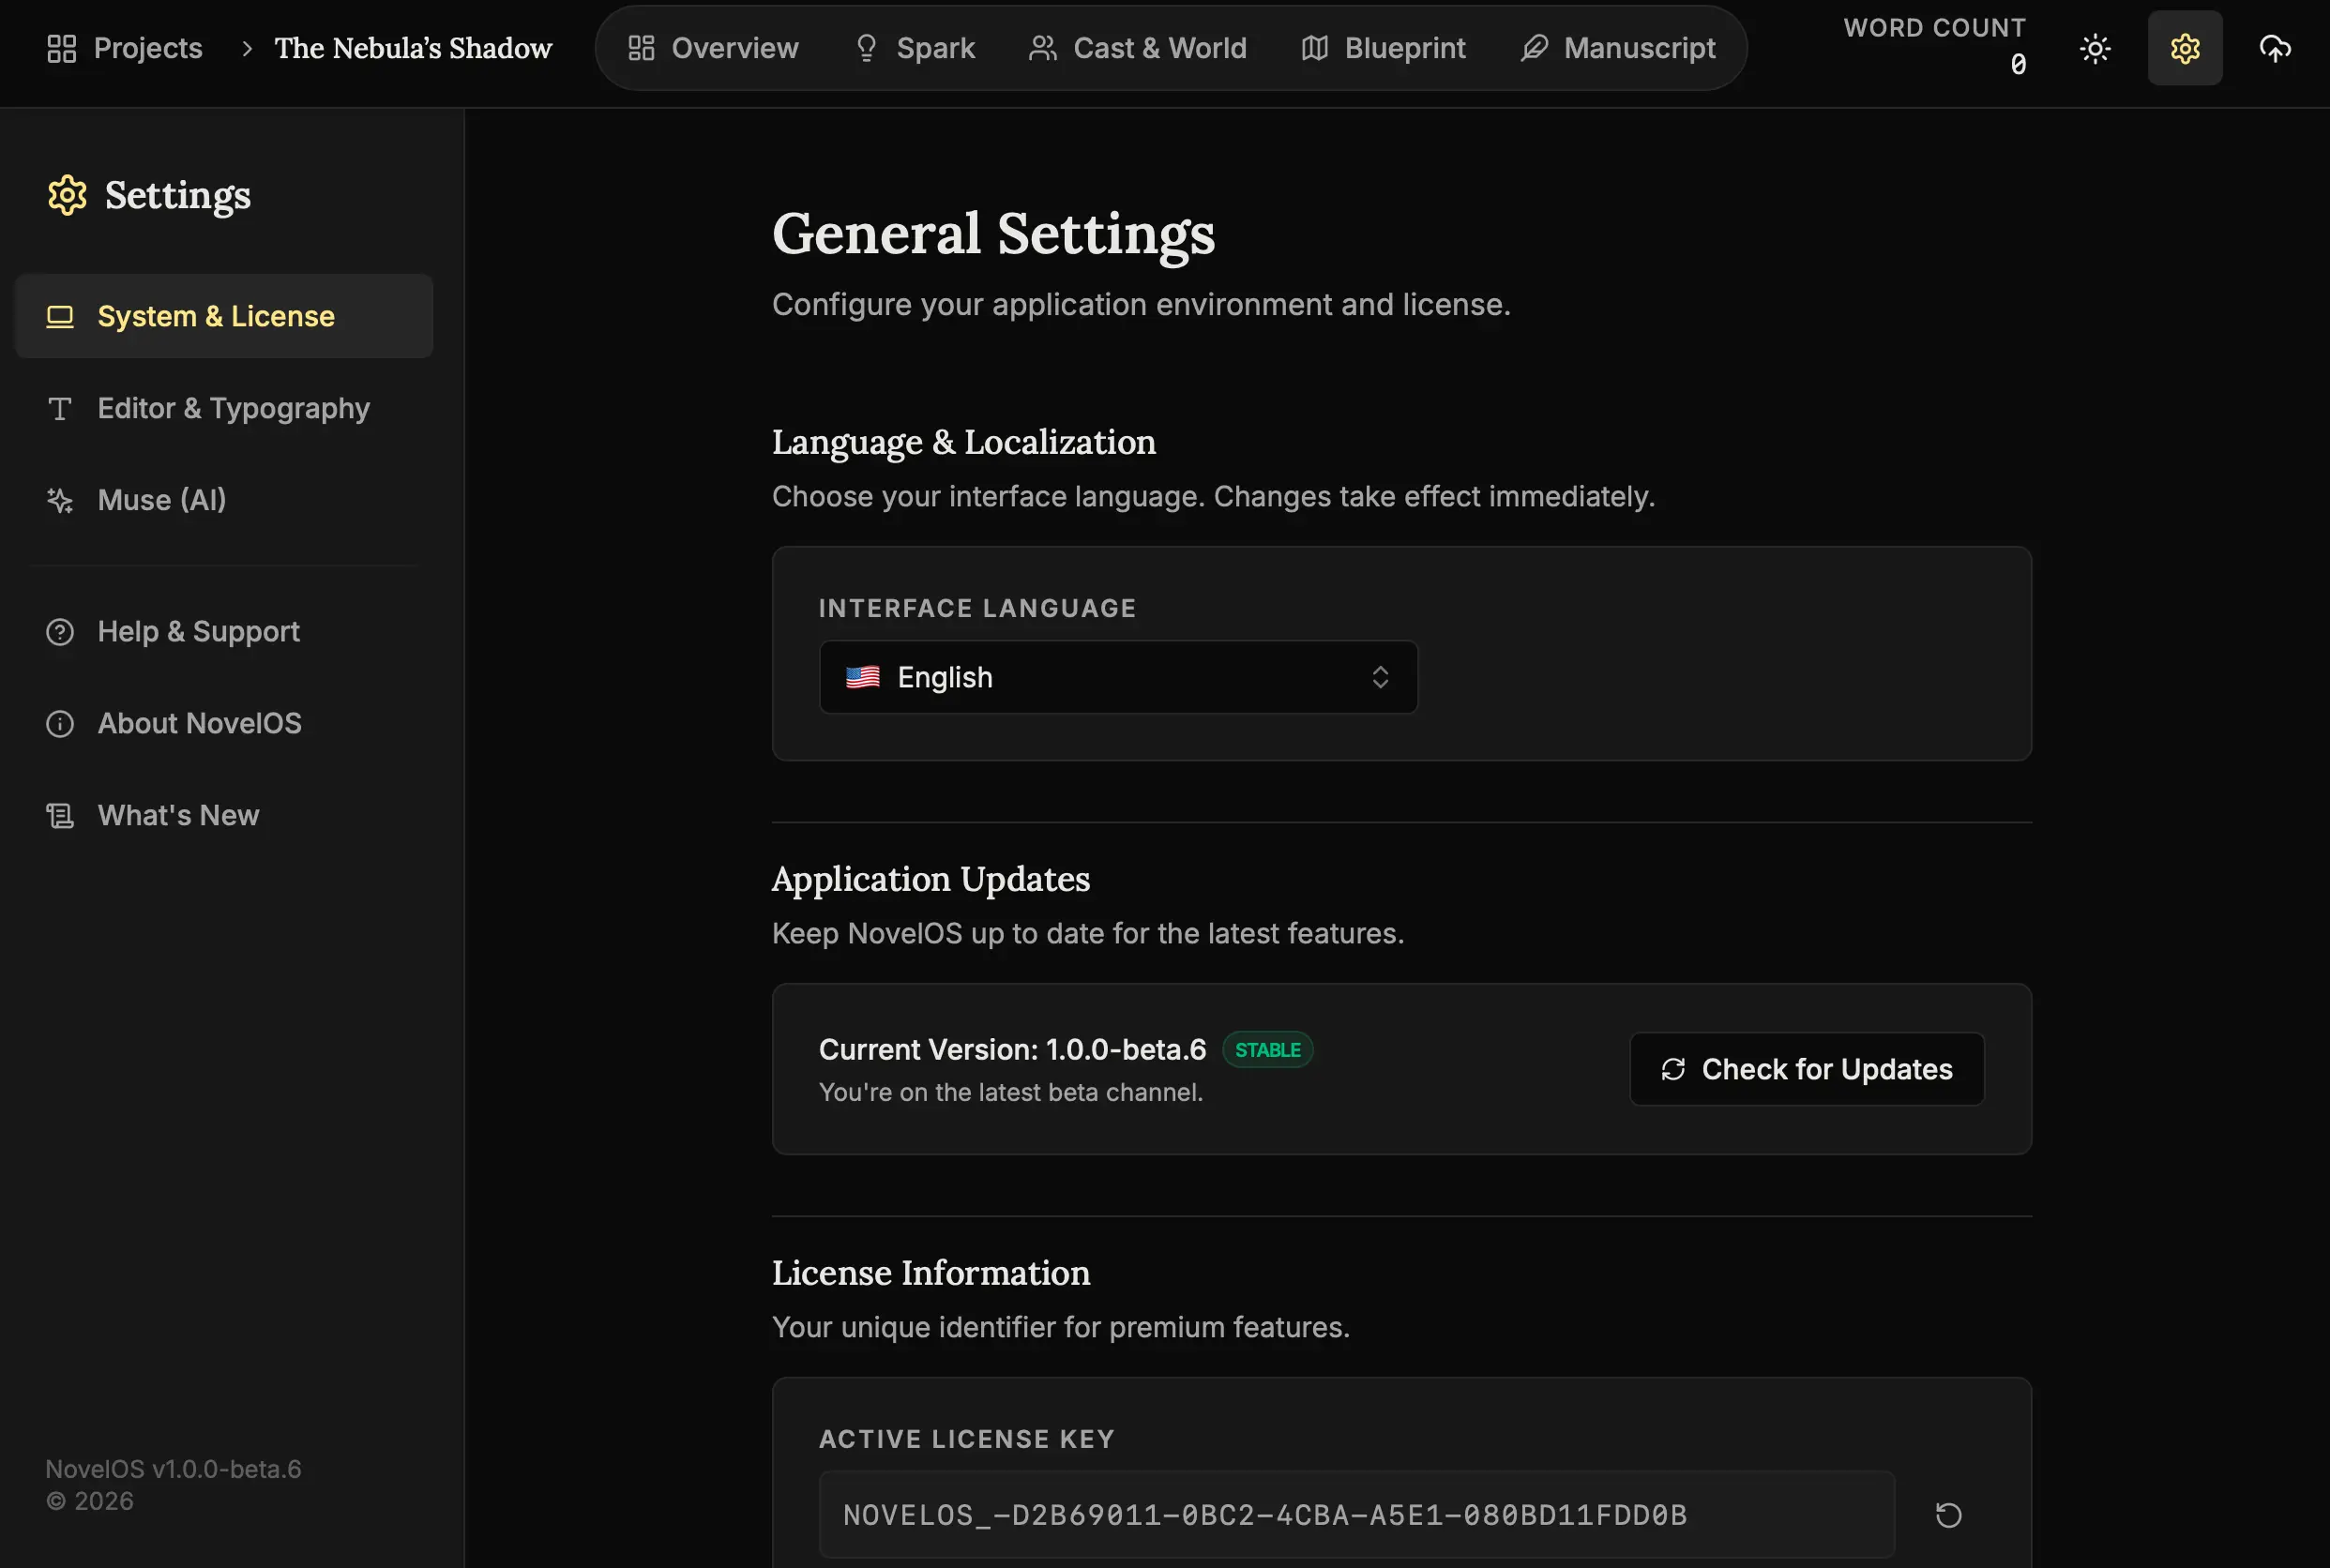
Step 5: Making it Yours
Finally, let’s make the studio feel like home.
- Open Settings:
Click the Settings icon. - Language:
Select your native language. Writing is hard enough; you shouldn’t have to translate the interface in your head. NovelOS supports 23+ languages to ensure you can create in your mother tongue.
Next Steps
You have built the container. Now, let’s invite a partner to help fill it.
- Lesson 2: Inviting the Muse - Learn how to set up your AI assistant to brainstorm ideas with you.
The foundation is laid. The container is ready. Let’s fill it with magic. 🖋️✨