Write the first chapter
Before you start: finish Outline in Blueprint.
Time for actual words. This tutorial writes the opening of chapter one, and along the way shows the tools that keep you writing instead of fiddling.
Add the chapter
- Press ⌘ 5 for the Manuscript. The Table of Contents on the left says No chapters yet.
- Click New Chapter. A chapter called Chapter appears and opens.
- Double-click its name in the Table of Contents, type
Judging Day, and press Enter. - In the editor, hover the title, click Add Subtitle under it and type
Saturday, nine o'clockinto Enter subtitle....
Write, and mention people
Click into the page (it says Begin your story...) and start the chapter:
Nobody in Little Wickham had died of marmalade before, and Mabel Thorne intended to keep it that way.Start the next sentence and type
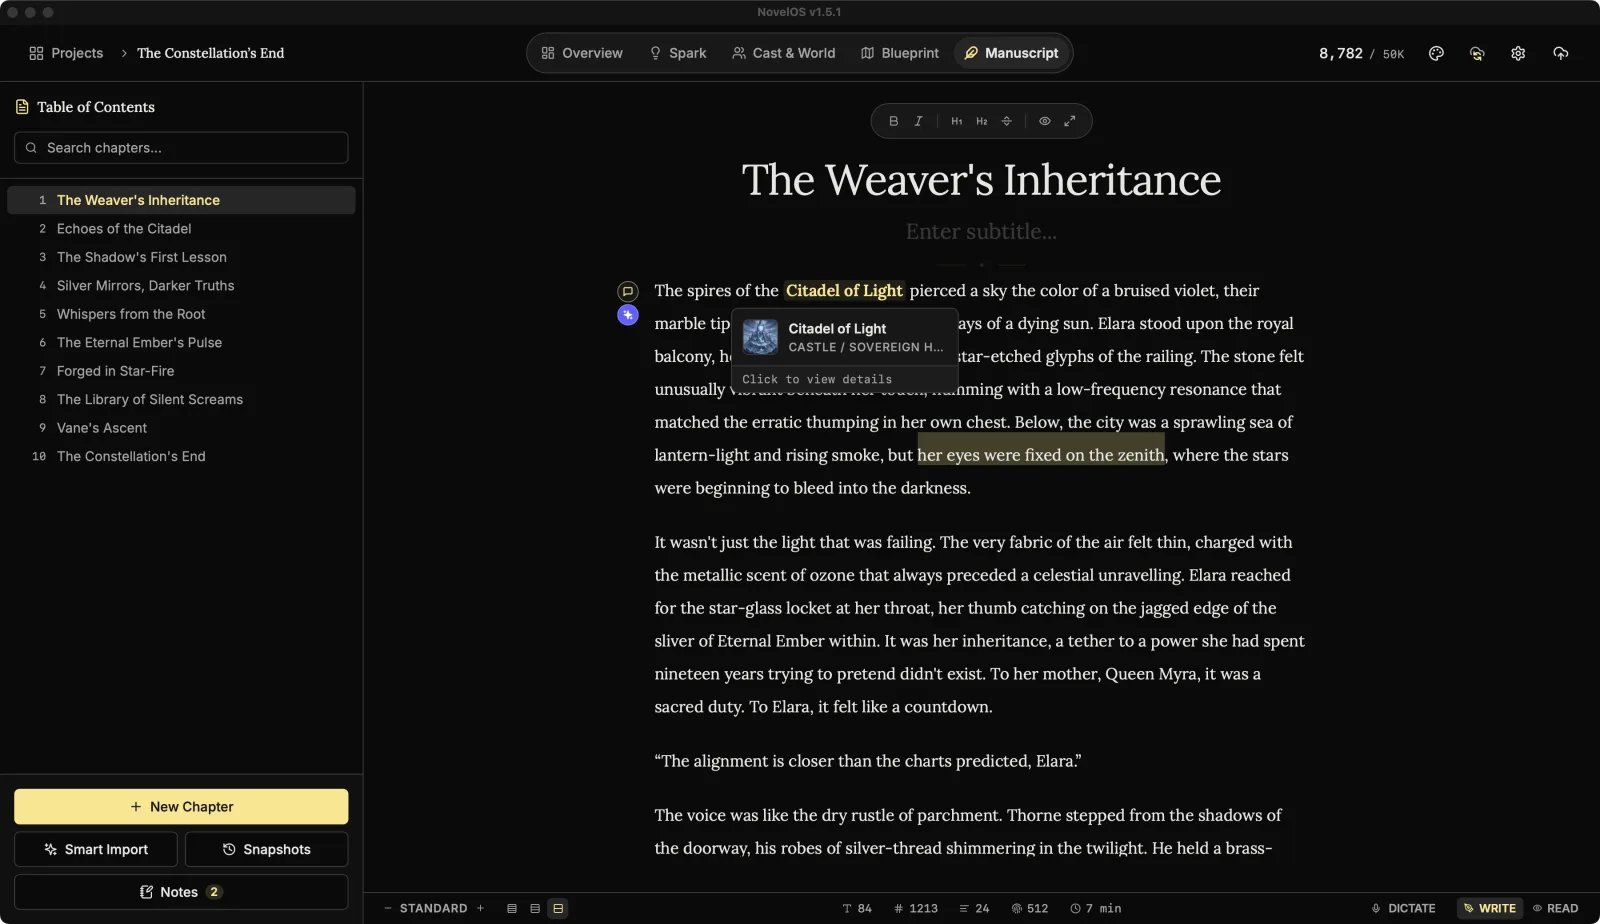
@Lio. A list of @mentions opens with Lionel Fairweather under Cast. Press Enter.Mention
@Irisand@Mabelthe same way somewhere in the next few lines.Hover one of the mentions.
You should now see a small card with the character's name and Click to view details. Clicking it opens their page in Cast & World.
- Click Scene Break in the toolbar to start the second half of the chapter, after the collapse.
Try the focus modes
Vanishing Mode is for the bit of a first draft where you keep rewriting the same sentence.
- Click Enable Vanishing Mode in the toolbar.
- Write a paragraph. Backspace does nothing and the lines above fade away. You can only go forward.
- Click Disable Vanishing Mode when the paragraph is down.
Zen Mode hides everything but the page. Press ⇧ ⌘ F to go in, and Esc to come out.
Glance at the status bar along the bottom. Word Count shows this chapter's words, and Overview's Today count is now above zero.
Leave yourself a note
- Select the words
died of marmaladein your first sentence. - Click Comment on Selection, type
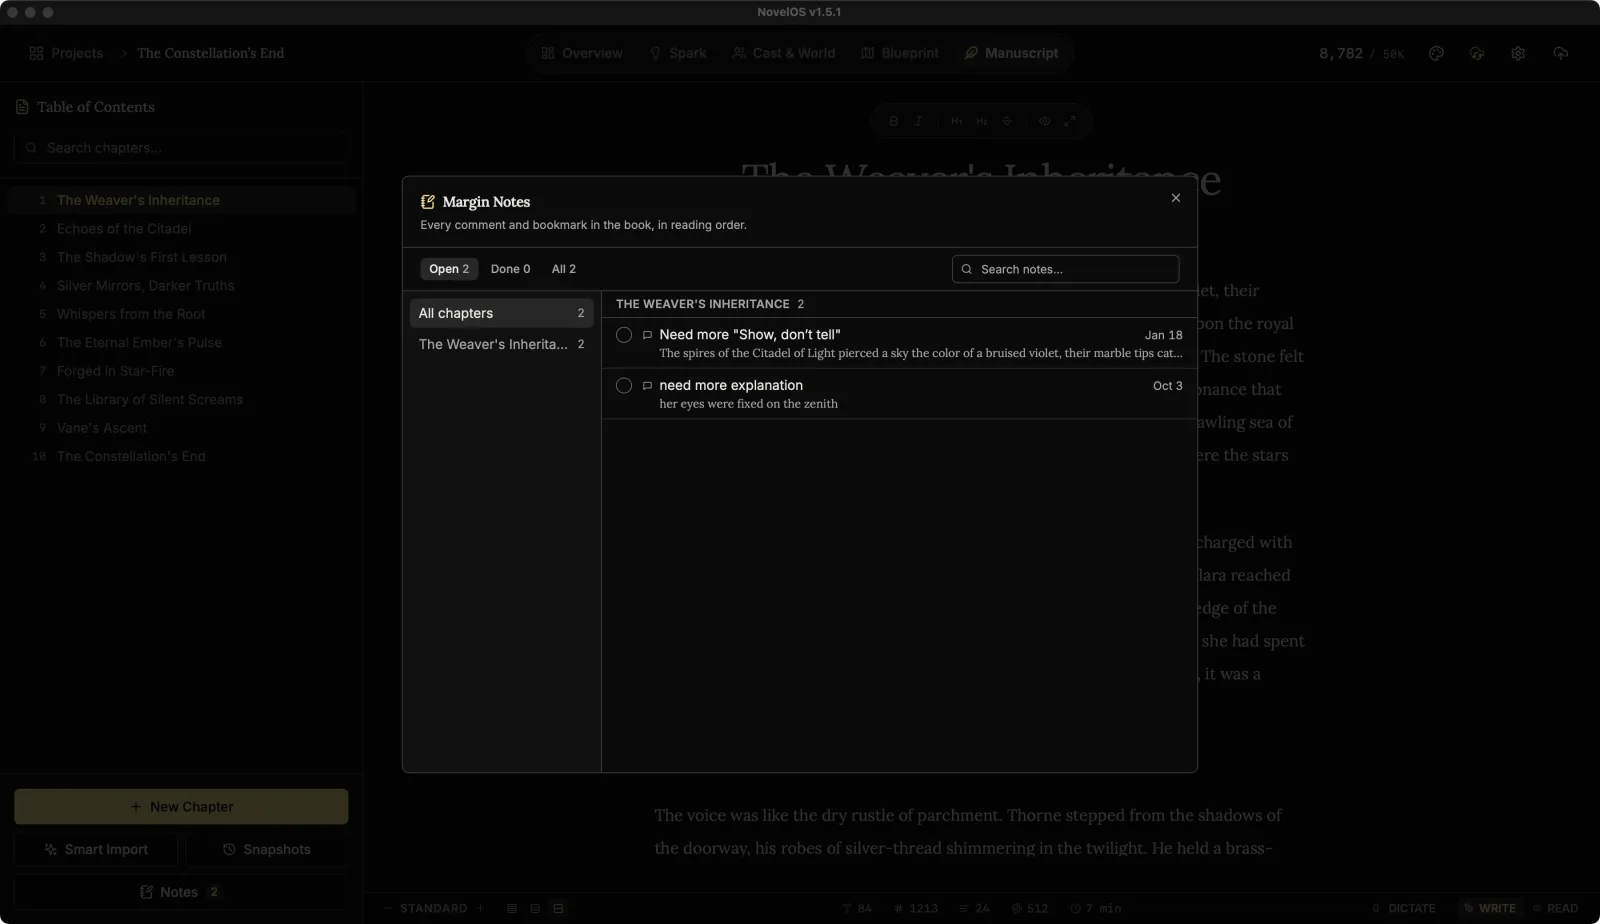
Poisoned spoon or poisoned jar? Decide before chapter 3.and press Enter. - Press ⇧ ⌘ M.
You should now see Margin Notes with your comment in it. Click it to jump back to the passage. Once you have decided about the spoon, tick the note done.
Take a snapshot
Before you try a bold rewrite, keep a copy.
- Press ⇧ ⌘ S. Snapshots of Judging Day opens.
- Type
First draft of the openingin Name this snapshot (optional) and click Take snapshot. - Close it, and rewrite the last paragraph however you like.
- Open Snapshots again and click your named snapshot.
You should now see what changed: added words highlighted, removed ones struck through, and a count of each such as "+12 words" and "−5 words". Restore would bring the old version back, and NovelOS keeps today's text as a snapshot first, so nothing is lost either way.
Put the scene in its chapter
- Press ⌘ 4 for Blueprint, click the Scenes tab and open Judging Day.
- Click Chapter (it says Unplaced) and pick Judging Day.
- Click Timeline View.
You should now see the scene in the chapter's own row, no longer under Outside the book.
Optional, with a Muse key: point at a paragraph and click Polish Prose (Show Don't Tell). The Alchemist offers three rewrites, and Apply swaps one in. See The editor.
Learn more
- Chapters, parts and the Manuscript
- The editor, focus modes and the status bar
- Mentions
- Comments, bookmarks and Margin Notes
- Snapshots of a chapter
Next: Revise: find, mentions, Read Aloud, Book Preview
Checked against NovelOS Studio 1.5.1 · Updated · View as Markdown