Spark idea boards
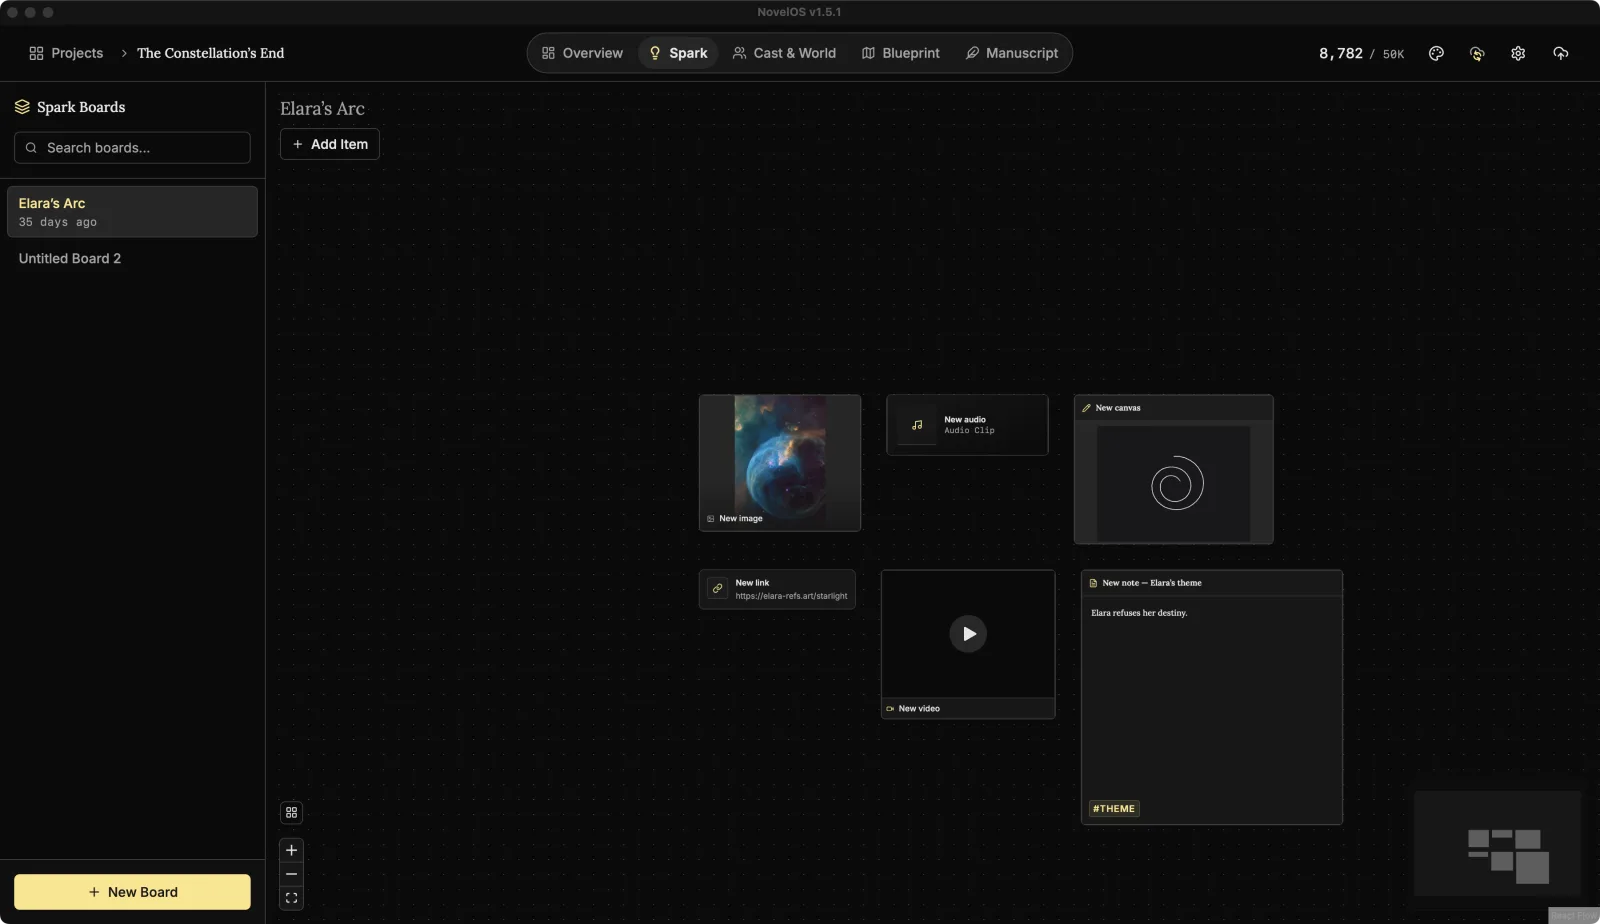
Spark is a pinboard for everything that isn't the book yet: a photo that looks like your villain's house, a voice memo from the car, a link to an article about medieval plumbing. Each book can have as many boards as you like. Open Spark from the top bar or press ⌘ 2 (Ctrl 2 on Windows).
Boards
The Spark Boards list on the left holds this book's boards. A new book starts with one, so there's always somewhere to put things.
- New Board at the bottom adds another, named "Untitled Board 2", "Untitled Board 3" and so on.
- Search boards... filters the list by name.
- Hover a board for its actions: the pencil renames it (press Enter to keep the name), the bin deletes it after one more click on Confirm Delete.
Deleting a board deletes its cards, and any picture, audio or video file that only those cards used.
You can also make a board from the command palette: search for New Board.
Add cards
There are six kinds of card: Note, Image, Canvas, Audio, Video, Link. Three ways to add one:
- Click Add Item under the board's name and pick a kind. The card lands in the middle of what you can see.
- Right-click an empty part of the board. The Insert Item menu puts the card where you clicked.
- Paste something, as below.
A new board shows Board Empty until it has a card.
| Card | What it holds |
|---|---|
| Note | Formatted text. Hover it and click Open Editor to write. |
| Image | A picture you upload, a web address, or one made with AI. |
| Canvas | A sketch you draw yourself. See Draw on a canvas card. |
| Audio | A sound file, with a player on the card. |
| Video | A video file, with a player on the card. |
| Link | A web address. Turn on Browser Mode to show the page itself in a mini browser on the card. |
Paste images, text or links onto the board
Copy something anywhere, click the board, and paste with ⌘ V. The new card appears where your mouse pointer is.
- A picture, audio or video file becomes an Image, Audio or Video card named after the file.
- A web address (starting with
http://orhttps://) becomes a Link card. - Any other text becomes a Note card, tagged
pasted.
Pasting while you're typing in a field pastes into the field, as you'd hope.
Move, resize and tidy
- Drag a card to move it. Drag the edges of any card except a Link to resize it.
- Scroll or drag the empty board to look around. The zoom controls in the corner zoom in, zoom out and fit the whole board on screen, and the mini map shows where you are.
- Tidy Up (the grid button in the lower left, once a board has two or more cards) lines every card up in a grid and fits the view to them. Handy after a long brainstorm that went everywhere.
The details panel
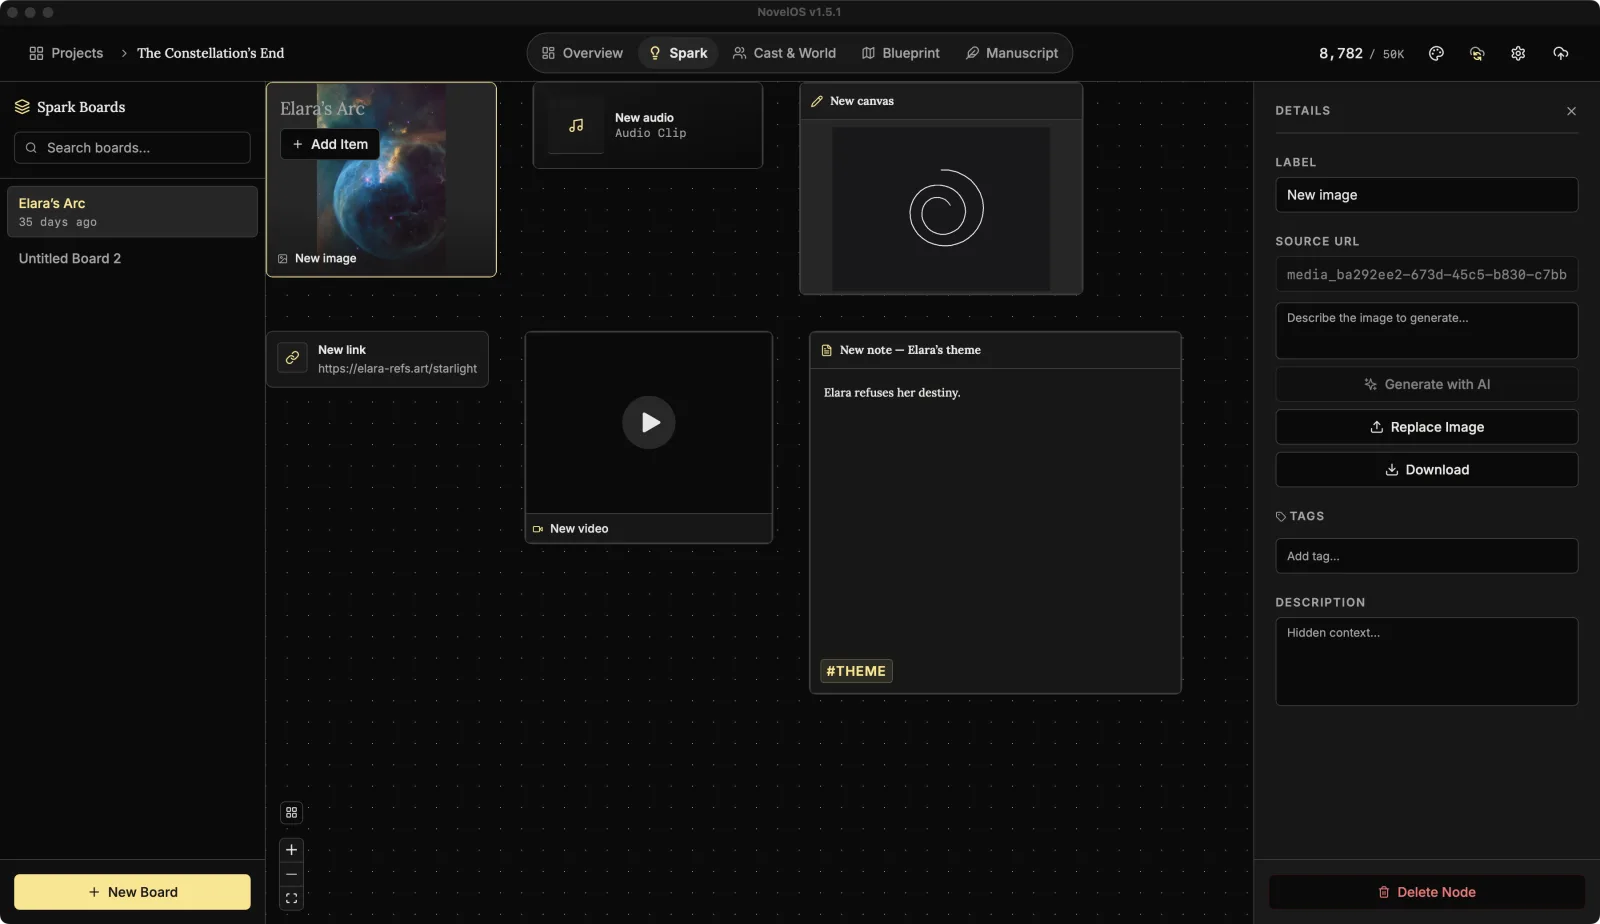
Click a card to open its details on the right. Drag the panel's left edge to make it wider. What you see depends on the card:
- Label: the card's title.
- Content: for a Note, Open Editor opens the full editor, with the formatting toolbar and a note of when it was last updated. For a Canvas, Open Editor opens the drawing editor and Download saves the drawing as a PNG.
- Source URL: for Image, Audio, Video and Link cards, the web address. Uploaded files are kept inside the book, so the address reads "Local database..." instead.
- Upload Image, Upload Audio, Upload Video: pick a file from your computer. Once there's one, the button reads Replace Image and so on. Image cards also have Download.
- Browser Mode, on Link cards: "Open in mini browser" on the card itself.
- Tags: type one and press Enter. Click the × on a tag to remove it.
- Description: hidden context, for your eyes only.
To delete a card, click Delete Node at the bottom of the panel and then Confirm delete. Or right-click the card, choose Delete Item and click the tick to confirm.
Make a picture with AI
An Image card's details have a box that says "Describe the image to generate...". Type what you want to see and click Generate with AI. The picture replaces whatever the card held, and the card gets a title, a description and tags to match. Your description stays in the box, so you can tweak it and try again.
This needs a Muse key.
Draw on a canvas card
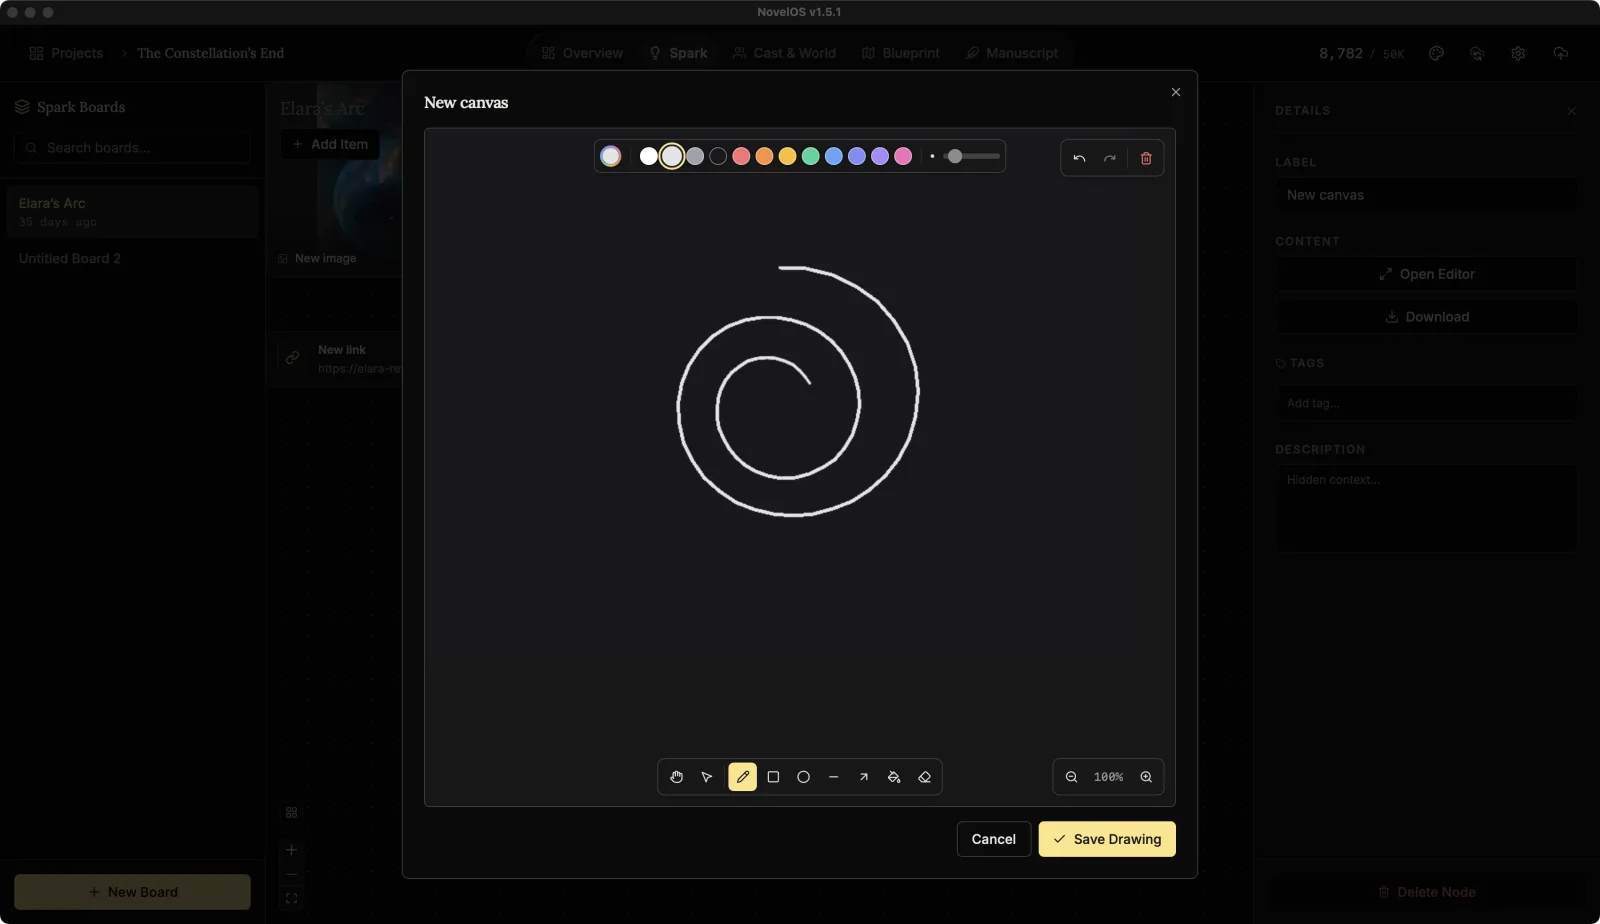
Hover a Canvas card and click Open Editor, or use the button in its details. You get a drawing editor:
Tools
| Tool | Does |
|---|---|
| Select | A plain pointer, for when you don't want to draw by accident. |
| Grab (Pan) | Drag the drawing around. Hold Space for the same thing without changing tools. |
| Pen | Freehand lines. |
| Rectangle, Ellipse, Line, Arrow | Shapes. Drag to draw one. |
| Fill | Fills an area with the current colour. |
| Eraser | Rubs out. |
Colour and size
- Custom Color opens a colour picker for any colour you like. Colours you pick there are kept as recent swatches next to the twelve presets.
- Brush Size sets how thick lines are, with a dot showing the size.
Undo, zoom and finish
- Undo, Redo and Clear Canvas (which wipes the drawing).
- Zoom Out and Zoom In. The percentage between them is Reset View.
- Save Drawing puts the drawing on the card. Cancel leaves without saving.
While you have unsaved strokes, Esc and clicking outside the editor do nothing, so a stray click can't throw away a drawing.
Put a board inside your writing
In a character's Biography, or the description of a world or lore entry in Cast & World, type / and choose Spark Board, then pick the board. A preview of the board appears in the text, with how many items it holds. Open Board (or the arrow, Open Board in Spark) takes you to the board itself.
Related
Checked against NovelOS Studio 1.5.1 · Updated · View as Markdown